Wednesday, December 14, 2011

Santa photo shoot

I talked about this a few days ago, but I wanted to give a little rundown of how the Santa photo shoot went.  The event was organized by Emerald Isle parks and recreation.  They had you make an appointment, which was wonderful.  No feeling pressured if your child needed some time to warm up to Santa and no standing around waiting for a long line.

The photographs were done by a professional photographer, Jeff Pennell (here is his site) instead of a mall photographer.  And Santa was awesome. Seriously, I cannot say enough nice things about this guy.  (Santa's website is here)  He was very authentic.

So when we got there, you couldn't see the photography area.  And when it was our turn, we walked around and there was no Santa.  Confused?  I was too.  One of the staff brought me in on the gag though.  They set her up in the center of the scene and then told her to watch the far door because Santa would be coming through there.


Of course, Santa wasn't coming through that door, he was in the beach shack behind her:
After a few minutes of shots like these and Bella being TOTALLY clueless that he was behind her, we finally told her to turn around.


She looks him up and down and says, "Where are your reindeer?"  So...so...funny.  I think Santa told her they were outside so they wouldn't be scared.  I don't really remember because I was laughing so hard.  He sat down next to her and they started to chat about what she wanted for Christmas.
Luckily my hypnosis was working and she asked for a dollhouse as planned. (It may have sounded more like 'doghouse' but I trust that Santa will get it right anyway) She refused to sit on his lap, which is probably ok since asking a kid to be comfortable sitting on a stranger's lap probably isn't the best lesson anyway.


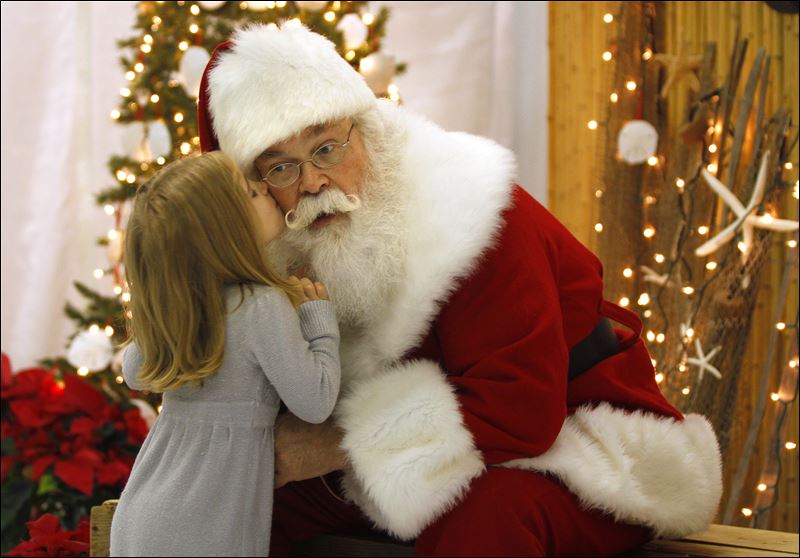
This photo cracks me up.  I don't even know what she was telling him.  Probably something about his reindeer, who knows.  But this is so totally her.  In charge, even with Santa.

And these are the others that so completely capture her:
 Such a little sweetheart.


And of course, the photo that was nationwide.  (Here is the post about that if you missed it)  Basically, our photographer and the Associated Press photographer got the same final shot.  We even remembered last minute to ask Santa to send Bella an elf.  And I will share his adventures of course.  It was a really great event and a wonderful start to our holidays!
 

Tuesday, December 13, 2011

Oh Christmas tree

Just wanted to share some photos of our Christmas tree and our girl who is so excited about Christmas this year. 

I got the instructions for camera settings for the photo above from pinterest (this link).  But it's manual mode with my f1.8 lens, ISO6400, shutter speed 1/30, set on a tripod.  I love the result.  These haven't been retouched at all either.  What do you think?


Monday, December 12, 2011

The Adventures of Elf the elf, Part 1

I'm so glad we got on the 'Elf on the shelf' bandwagon before Bella was too old.  We got a great deal on it during a super sale too: only $15 when it normally retails for $30-$40.  We took Bella to see Santa on November 30th, so it was perfect timing and I had her ask Santa to send her an elf.

She was so excited the next morning to find the book and then see the elf on the mantle waiting for her.


I asked her what his name was going to be and she said, very certainly, 'Elf.'  I tried a few times to get her to pick a different name, but she definitely thinks he is Elf and that's all there is to it.  We read the book and made sure she knew that the only real rule was that she couldn't touch him or he would lose his magic.
Day 2: After having a bare tree in the living room for 8 days, Elf decided to start decorating the tree.


Day 3: Goofball Elf takes a whirl on the fan.
Day 4: Elf flips

Day 5: Elf decided to take a chance and come down to Bella's level.  She had been very good, so he brought her a little gift (a little owl she had been pining over that I said she couldn't have, but then snuck into the cart). We had been wrapping the night before, so he got into our supplies.


Bella pointed at him and told Vinny, "Don't touch him Daddy!"  Then she grabbed him and went running around the house.  So much for that.  So he disappeared for a day to regain his magic.

Day 6: Elf MIA to regain magic

Day 7: Elf reappears, bathing in a bowl full of marshmallows.  Bella runs off with him again.

Day 8: Elf MIA to regain magic

Day 9: After a long evening of making cookies, I left the flour out.  Elf decided to make a flour angel.

 Day 10: The flour angel stunt was messier than anticipated.  Elf needed a shower:


Day 11: Elf takes a little fishing trip

Bella finally seems to understand the words 'do not touch.'  Whew!  I'll give a rundown of other Elf activities soon!

Friday, December 9, 2011

Superstar Bella

Bella recently had a little photo shoot with Santa in Emerald Isle.  The experience was amazing.  We had an appointment, so no waiting in line with 50 other kids and being pushed out of the way after they take 2 shots.  There was a professional photographer (nuff said).  Proceeds are going to benefit a local food bank and the humane society.  The Santa was awesome, as Santa should always be.  And now our little girl is all over the internet.That's right...and not just on our blog.


I'll share some of the Santa photos in another post, but there was one shot that was pretty awesome:

It just so happened that the Associated Press had a photographer there who took this photo.  It ran with an article about how the recession is affecting Christmas all over the country.  It's been pretty amazing to see over 16 pages of google hits for her name.   This photo does say it all though.  It captures her so well.  Her loving little soul and gentle heart.  I'll just be over here, being a proud mama...

Tuesday, November 22, 2011

Crayon art

I finally got sucked into pinterest a few weeks back (you can check it out here).  Basically, it is a digital bulletin board.  You can 'pin' things that you find online and sort them so that they are organized.  Then you follow others who have similar tastes and it becomes a big swap meet of cool ideas.  I'm (of course) addicted and I've been trying all kinds of new projects.  This was the first one and I'm very excited and proud of it.

OK, spoiler alert, here is the finished product:

This was my inspiration on pinterest (the website is here):

I have been taking a painting class and had recently gone through the painful process of making my own elaborate color wheel.  Sort of like this one:


So with those on my mind, I decided to do a crayon color wheel.  In chatting with my art teacher, she mentioned that big globs of melted crayon might come off the canvas, so I knew I wanted my melted crayon to be thin to prevent that.

Step 1: buy a canvas
Step 2: draw a circle on the canvas so you have an even guide of where to glue the crayons

I know, helpful right?  I already did a sort of trial setup with my crayons so I knew about how big it needed to be based on how many crayons I wanted had on hand.  You'll see that I marked the circle with some guidelines to help keep it even.  Those guidelines included 3 spots (at clock positions 12, 4, and 8) for my primary colors to anchor the circle.

Here is that circle a little further out so you can see what my dimensions looked like:


Step 3: Lay out your crayons so you have them in the right positions and ready to go


For me, I decided to go with 3 of each primary and secondary color and 2 of each in between color (2 in between tones between each primary-secondary space. (translation, Primary: red, blue, yellow; Secondary: purple, green, orange; In betweens, blue-blue-green, blue-green-green, green-green-yellow, green-yellow-yellow, yellow-yellow-orange, yellow-orange-orange, orange-orange-red, orange-red-red, red-red-purple, red-purple-purple, purple-purple-blue, purple-blue-blue)  Obviously, the crayon colors are not as conveniently named as purple-purple-blue, etc.  You sort of have to play it by sight.

Step 4: get your glue gun ready (I put a piece of glass under the tip to catch any glue drips so I didn't mess up the floor.  I prefer glass to paper because it's less likely to stick to the glue glue when you pick it up.)


Step 4: Glue your center primary color crayons (this is why I had 3 of each of them) down on the marks you made to anchor the circle.

Step 5: Don't be an idiot like me and start with purple before realizing that purple is NOT a primary color.  Guess I got overexcited.  On the plus side, it gave me a chance to see what happened when you screw up and have to pull one off.  The good news: they're decently easy to pull off and the old glue gets hidden, so not the end of the world.

Step 6: Try that whole 'glue down the primary colors center crayon' thing again.  Then glue down the secondary colors in between (clock positions 2, 6, and 10)

Sorry the photo is a bit blurry, but you get the picture I think:

Step 7: Repeat for the remainder of the crayons
Now time for the fun part!

Step 7: take your creation to an area that you can get splattered.  This could be inside with drop cloths, or outside, whatever works.  It was a nice day out, so we went to the yard.
 Step 8: get your hair dryer plugged in on its warm/hot setting and turn it on.  Let it heat up a bit before aiming it at the crayons.  That way your first crayons get the same heat burst as the rest.


Here's where your artistic side will take over.  How you move that dryer affects what the wax splatter looks like. I moved my wrist side to side fairly rapidly, which is how I also dry my hair.  Turns out, it made an awesome sunburst sort of spray.  I just kept rotating the canvas as I felt like each color was done (to keep the flow going the same direction all the way around).  I even let Bella take a turn at it, which was sort of the whole point initially.  But we were outside, and there were butterflies.  So she went chasing butterflies and I did my dryer thing.  All done, I had a nice light coat of wax.  No globs, and I love it.

Originally I had thought about painting a word in the center of the circle, but after I saw it I decided against it because it's so great by itself.  I'm still considering making a frame out of rulers for the edge, but I like it a lot by itself.  What do you think?


Looking forward to sharing more pinterest projects soon!

Thursday, November 10, 2011

LOL: Pi(e)

Just had to put this where I wouldn't forget it:

Friday, November 4, 2011

Pippen vs. Dora

Pippen is such a little clown.  He spazzes out, makes his tail fluff out to racoon size and tears around the house pouncing on anything that moves.  Absolutely cracks me up!  Bella was playing dolls downstairs and Pippen decided enough was enough for Dora the Explorer.


Dora never stood a chance.  And yes, I know in the video I hand Dora to him, but it was after he initiated the attack and I was laughing so hard I had to go grab the phone to video him before he grew bored. Crazy munchkin cat.

Wednesday, November 2, 2011

Overheard: A good life

"The good life starts when you stop looking for a better one"

I saw this quote in Extra Country magazine, and it's amazingly true and struck a real cord with me.  May we all be so blessed to live the good life.

Monday, October 31, 2011

Halloween 2011

Happy Halloween to all you out there on the web.  Thought I'd share some photos from our recent Trick or Treating.

On Thursday we went to the NC Aquarium in Pine Knoll Shores for their trick or treat under the sea.  I can't say enough good things about this event.  There were tons of decorations, lots of vendors handing out candy,

And even an underwater pumpkin carving contest in the shark tank with a bunch of staff divers.

 Those pumpkins behind her there are in the shark tank!

Hermit crab Bella!  They also had a cool maze, face painting, and a hay ride to take us back to our car.  And it was only $6 each...a crazy great deal!

We had lots of fun with our Halloween attire.  She went as Cinderella for the aquarium, and a cat for Halloween night, but a fashion maven like Bella had to have other outfits as well.  This was my favorite:


For Halloween night itself, we headed over to one of Bella's friend's, Blake's, house.  There was a whole sky rainbow that was awesome on the way there. (I'll share that in a few days)

Bella and Blake played for a bit and then we all headed out trick or treating.  They had a blast and got very worn out.


 And my favorite shot of the night:

Friday, October 28, 2011

Unreal Clouds

Since I started taking the painting class, I've been paying more and more attention to the sky.  And I've noticed one thing over all others: the real sky is absolutely unreal!

A few days ago I shared the big storm that rolled in.  Those were called shelf clouds by the way.  Then I saw these:


If I had painted these, the critique would be easy.  The real world is pretty unreal though.

Wednesday, October 26, 2011

Big Ol' Storm

This CRAZY big storm rolled in and I had to share the photos.


Here is the backside of it:

Oddly enough, the massive thing didn't drop one bit of rain on our house.  I think it saved itself for the coast.Very creepy.

Monday, October 24, 2011

Ballet - The first year - Part 2

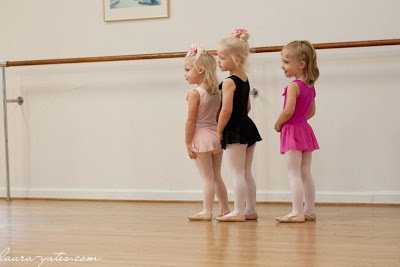
These photos are courtesy of my friend, Laura Yates. (here is her website) Her daughter Maddy is in Bella's class (and is awesome at it, BTW), and Laura is a professional photographer.  Yes, please!


Bella has actually been listening in class a lot better.  We have 'the talk' about how ballet class is a place to listen and learn, not to play...every time.  But it seems to be working.

I've also been taking ballet classes myself.  It looks like our adult class will also be doing the recital in May, so I look forward to sharing my own dancing craziness at some point too :) (and, yes, I tried having the talk with myself, but it didn't work.)


Friday, October 21, 2011

Real Montessori - Seasons Folders

While I was going crazy printing stuff out for the continent folders (see them here), I thought I would go ahead and make the folders for the seasons. 

Each season got its own colored folder with similarly colored construction paper inside.  There are photos in the folder associated with each season.  When she shows interest, we talk about the photos and that season and I give her the option to paste the photos on the paper.  Once the photos are pasted, I'll 3-hole punch them and put them in the folder as a booklet for her to keep.

You can always look your own photos up for each season like I did, but I thought I'd show you what I used to help get you thinking about what photos you might want to use.

Spring

Winter

Fall

Summer